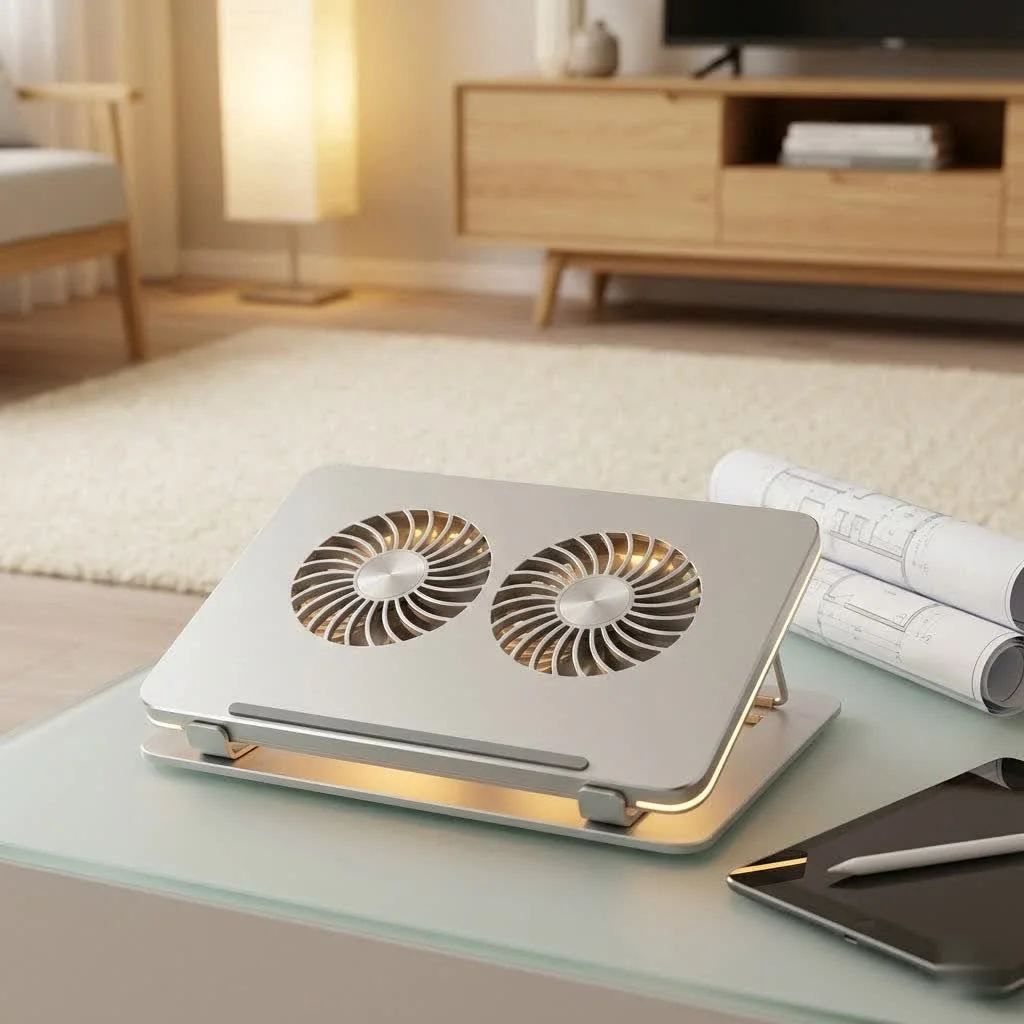
A 3D print laptop cooler is a custom-designed thermal management system that can significantly reduce laptop temperatures by several degrees Celsius, preventing thermal throttling and improving performance. Unlike generic, one-size-fits-all products, 3D printing allows users to craft a bespoke cooling solution tailored precisely to their machine’s unique airflow patterns, vent locations, and hot spots.
This guide explores everything you need to know about designing, printing, and optimizing your very own 3D print laptop cooler, transforming overheating frustrations into a satisfying DIY triumph.
Why a Custom 3D Print Laptop Cooler is a Game Changer
While off-the-shelf coolers are designed for a broad range of laptops, they cannot perfectly address the unique airflow patterns, vent locations, and hot spots of your specific model. A custom 3D print laptop cooler, however, can be precisely engineered to:
- Maximize Airflow: Direct cool air exactly where your laptop needs it most, avoiding blocked vents.
- Prevent Thermal Throttling: Significantly reduce internal temperatures, boosting performance and preventing your laptop from slowing down under load.
- Improve Ergonomics: Create a stand that perfectly elevates your screen and keyboard for a comfortable working posture.
- Be Cost-Effective: Often, the materials and components for a DIY solution are more affordable than a high-end commercial cooler.
- Unleash Creativity: Design something truly unique that reflects your style and perfectly fits your workspace.
The beauty of a custom 3D print laptop cooler is that it turns a technical challenge into a creative opportunity.
Designing Your Perfect 3D Print Laptop Cooler
The journey to an effective 3D print laptop cooler begins with a thoughtful design. This isn’t just about making a pretty object; it’s about understanding thermal dynamics and how to leverage your 3D printer for optimal cooling.
Key Considerations for Effective Design
When sketching ideas or modifying an existing design, keep these critical factors in mind:
- Laptop Vent Placement: Identify where your laptop draws in cool air and exhausts hot air. Your cooler should never obstruct these critical pathways; instead, it should enhance them.
- Airflow Channels: Design channels and elevated surfaces that guide cool air directly to intake vents and allow hot air to escape freely. Hexagonal patterns, for instance, are great for allowing air to flow through while maintaining structural integrity.
- Passive vs. Active Cooling:
- Passive Coolers: These simply elevate your laptop, allowing for better natural convection. They are easier to print and require no electronics.
- Active Coolers: These integrate fans to actively push or pull air. This is where you see significant temperature drops. You’ll need space for fans (like 80mm or 120mm fans) and a way to power them, typically via a USB port on your laptop or an external power supply.
- Structural Stability: Your 3D print laptop cooler needs to be sturdy enough to support your laptop’s weight without flexing or breaking.
- Portability: Do you need it to be easily disassembled or foldable for travel? Many creative designs offer this flexibility.
|
Our Picks for the Best Laptop Cooler in 2026
As an Amazon Associate I earn from qualifying purchases.
|
||
| Num | Product | Action |
|---|---|---|
| 1 | AICHESON Laptop Cooling Pad 5 Fans Up to 17.3 Inch Heavy Notebook Cooler, Blue LED Lights, 2 USB Ports, S035, Blue-5fans |

|
| 2 | Laptop Cooling Pad, Laptop Cooler 6 Quiet Fans for 12\"-17\" Laptops, Gaming Laptop Fan Cooling Pad with 5 Height Adjustable, Slim Portable USB Powered, 2 USB Ports & Phone Holder |
|
| 3 | Laptop Cooling Pad, Gaming Laptop Cooler for 13-19 Inch Laptops, RGB Lights Laptop Fan Cooling Pad with 3 Height Adjustable and 3 USB Ports, 4.72 Inch Large Turbo Fan, Max 3500RPM |
|
| 4 | llano V12 Laptop Cooling Pad, Gaming Laptop Cooler Stand with 5.5inch Powerful Turbo Fan, Adjustable Speed, Touch Control, 3-Port USB A, for Fast Cooling Laptop 15.6-19in, Black (No RGB) |
|
| 5 | KeiBn Laptop Cooling Pad, Gaming Laptop Cooler 2 Fans for 10-15.6 Inch Laptops, 5 Height Stands, 2 USB Ports (S039) |
|
| 6 | havit HV-F2056 15.6\"-17\" Laptop Cooler Cooling Pad - Slim Portable USB Powered (3 Fans), Black/Blue |
|
| 7 | ChillCore Laptop Cooling Pad, RGB Lights Laptop Cooler 9 Fans for 15.6-19.3 Inch Laptops, Gaming Laptop Fan Cooling Pad with 8 Height Stands, 2 USB Ports - A21 Blue |
|
| 8 | llano V12 RGB Laptop Cooling Pad, Gaming Laptop Cooler with 5.5 Inch Powerful Turbofan, Fast Cooling Laptop 15.6-21in, Adjustable Speed, Touch Control, LCD Screen, Black (RGB) |
|
| 9 | Kootek Laptop Cooling Pad, Laptop Cooler with 5 Quiet Fans for 12\"-17\" Computer PC Notebook Gaming Laptop Fan, Height Adjustable Laptop Cooling Stand Laptop Accessories, Blue |
|
| 10 | Razer Laptop Cooling Pad: Adaptive Smart - Intelligent Fan Control - Airtight Pressure Chamber - Fits Most Laptops & Macbooks 14” to 18\" - Preset & Custom Fan Curves - 3 Port USB Type A - Chroma RGB |
|
Where to Find Design Inspiration and Files
The 3D printing community is vibrant and generous! Websites like Thingiverse and MyMiniFactory are treasure troves of existing 3D print laptop cooler designs, ranging from simple risers to complex active cooling pads. You can download STL files and either print them directly or modify them using CAD software like FreeCAD or Fusion 360 to perfectly fit your laptop.
Choosing the Right Materials for Your 3D Print Laptop Cooler
The filament you choose for your 3D print laptop cooler is crucial, especially if you plan on integrating active cooling or if your laptop runs particularly hot. The goal is a material that’s both strong and heat-resistant.
Best Filaments for Laptop Coolers
- PETG (Polyethylene Terephthalate Glycol): This is often my go-to recommendation for functional prints like a 3D print laptop cooler. PETG combines the ease of printing of PLA with superior strength, durability, and most importantly, good heat resistance. It’s also moisture and chemical resistant, making it a robust choice for both indoor and outdoor applications.
- ABS (Acrylonitrile Butadiene Styrene): If your laptop generates significant heat, ABS is an excellent choice due to its high strength and impressive heat resistance. However, it can be more challenging to print, often requiring an enclosed printer to prevent warping and proper ventilation due to fumes.
- HTPLA (High-Temp PLA): A newer innovation, HTPLA offers the printability of standard PLA but can withstand temperatures up to 100°C after proper heat treatment, making it a viable option for a 3D print laptop cooler where heat resistance is key without the fuss of ABS.
- PLA (Polylactic Acid): While easy to print and affordable, standard PLA is generally not recommended for parts that will be exposed to significant heat. It can soften and deform at temperatures above 60°C, which can easily be reached by a hot laptop, especially if left in a warm environment. It’s acceptable for simple, passive stands that primarily elevate the laptop without direct heat transfer.
- NylonX (Carbon Fiber Nylon): For the ultimate in strength and high-temperature resistance, NylonX is fantastic, though it is a more advanced filament to print with, often needing an enclosure and specific settings.
“Designing effective thermal solutions, even for custom 3D printed laptop coolers, boils down to optimizing airflow and material choice,” says Dr. Elias Vance, Senior Thermal Engineer at Tselk.com. “It’s not just about elevating the laptop; it’s about strategically guiding air and using filaments that can handle the heat. The beauty of 3D printing is the iterative design process, allowing for perfect customization.”
Assembling and Optimizing Your 3D Printed Cooling Solution
Once your 3D print laptop cooler components are fresh off the print bed, it’s time for assembly and testing.
Integrating Fans and Electronics
For active cooling, you’ll typically need:
- Fans: Standard computer fans (e.g., 80mm or 120mm for larger pads, or smaller 40mm fans for compact designs).
- Power Source: Most laptop fans can be powered via your laptop’s USB port (5V). You might need a step-up module if your fans require 12V to reach full speed, or a simple USB fan controller for speed adjustment.
- Fasteners: Small screws (M3x8 are common) or double-sided tape can secure fans and other components.
- Cable Management: Design channels or clips within your 3D print laptop cooler to keep wires tidy and prevent them from interfering with airflow.
Testing and Fine-Tuning
After assembly, it’s crucial to test your 3D print laptop cooler under load. Use software to monitor your CPU and GPU temperatures both with and without the cooler. Experiment with fan placement, fan speed, and even the orientation of your laptop on the cooler. Small adjustments can often lead to significant improvements in temperature drops.
Maintenance and Longevity of Your DIY Cooler
To ensure your 3D print laptop cooler continues to perform optimally, regular maintenance is key:
- Dust Removal: Periodically clean the fans and cooler structure to prevent dust buildup, which can impede airflow.
- Component Checks: Ensure all fan connections are secure and that the fans are spinning freely.
- Structural Integrity: Inspect the 3D printed parts for any signs of wear, cracking, or deformation, especially if using materials like PLA that are less heat-resistant.
FAQ: Your Burning Questions About 3D Print Laptop Coolers Answered
Q1: Are 3D printed laptop coolers truly effective at reducing temperatures?
A1: Absolutely! Well-designed 3D print laptop coolers, especially those with integrated active fans, have been shown to reduce laptop temperatures by several degrees Celsius, preventing thermal throttling and improving performance. The key is optimizing airflow and fan placement for your specific laptop.
Q2: What are the best materials for a 3D printed laptop cooler?
A2: For most 3D print laptop cooler applications, PETG is highly recommended due to its balance of ease of printing, strength, and heat resistance. If your laptop runs extremely hot, ABS or HTPLA can offer even better heat tolerance. Avoid standard PLA for parts directly exposed to significant heat.
Q3: Can I add fans to a passive 3D printed laptop stand?
A3: Yes, many passive stand designs can be modified to integrate fans. You’ll need to design or adapt fan mounts and consider how to route power, typically from a USB port, to transform it into an active 3D print laptop cooler.
Q4: Where can I find designs for a 3D print laptop cooler?
A4: Popular online repositories like Thingiverse, MyMiniFactory, and Printables.com offer a vast array of free 3D print laptop cooler designs. You can download STL files and either print them as-is or use CAD software to customize them.
Q5: Is it difficult to 3D print a functional laptop cooler?
A5: Printing a basic elevated stand is relatively easy, even for beginners. Creating a complex active 3D print laptop cooler with integrated fans requires a bit more technical know-how in design and electronics, but many online tutorials and communities can guide you through the process.
Q6: How do I ensure proper airflow with my 3D printed laptop cooler?
A6: Design your 3D print laptop cooler to elevate the laptop significantly, creating a clear gap beneath it. Incorporate open patterns (like hexagons) and channels that align with your laptop’s intake and exhaust vents. Strategic fan placement to push cool air into intake vents or pull hot air away is also crucial.
Q7: What are the main benefits of a custom 3D printed laptop cooler over a store-bought one?
A7: The primary benefits are superior customization and fit, which leads to more efficient cooling tailored to your specific laptop’s thermal characteristics. You can choose specific features, materials, and aesthetics, often at a lower cost than comparable commercial solutions, making your 3D print laptop cooler uniquely yours.
The Future of Custom Cooling is Here
Embracing a 3D print laptop cooler isn’t just a hobby; it’s a smart, effective way to enhance your laptop’s performance and longevity. By leveraging the power of 3D printing, you gain control over your laptop’s thermal environment, moving beyond generic solutions to a perfectly tailored experience. So go ahead, fire up your printer, and design a 3D print laptop cooler that truly meets your needs. Your laptop will thank you for it!
Frequently Asked Questions
Are 3D printed laptop coolers effective at reducing temperatures?
Yes, well-designed 3D print laptop coolers, especially those with integrated active fans, can reduce laptop temperatures by several degrees Celsius. This prevents thermal throttling and improves overall performance by optimizing airflow and fan placement for your specific laptop model.
What are the recommended materials for a 3D printed laptop cooler?
For most 3D print laptop cooler applications, PETG is highly recommended due to its balance of ease of printing, strength, and heat resistance. If your laptop runs extremely hot, ABS or HTPLA can offer even better heat tolerance, with HTPLA withstanding temperatures up to 100u00b0C after heat treatment.
Can I integrate fans into an existing passive 3D printed laptop stand?
Yes, many passive stand designs can be modified to integrate fans. You will need to design or adapt specific fan mounts and consider how to route power, typically from a 5V USB port, to transform it into an active 3D print laptop cooler.
Where can I find design files and inspiration for a 3D print laptop cooler?
Popular online repositories such as Thingiverse, MyMiniFactory, and Printables.com offer a vast array of free 3D print laptop cooler designs. You can download STL files and either print them directly or customize them using CAD software like FreeCAD or Fusion 360.
What are the main advantages of a custom 3D printed cooler over a store-bought one?
The primary benefits of a custom 3D print laptop cooler are superior customization and a perfect fit, leading to more efficient cooling tailored to your specific laptop's thermal characteristics. You can choose specific features, materials, and aesthetics, often at a lower cost than comparable commercial solutions.
How do I ensure optimal airflow with my 3D printed laptop cooler design?
To ensure proper airflow, design your 3D print laptop cooler to elevate the laptop significantly, creating a clear gap beneath it. Incorporate open patterns, such as hexagons, and channels that align precisely with your laptop's intake and exhaust vents. Strategic fan placement to push cool air into intake vents or pull hot air away is also crucial for maximum effectiveness.
Design and Assemble a 3D Print Laptop Cooler
Learn how to design, print, and assemble a custom 3D print laptop cooler to enhance your laptop's performance and longevity.
Identify your laptop's vent placement and hot spots. Design airflow channels and elevated surfaces to guide cool air and allow hot air to escape. Consider if you need passive elevation or active cooling with integrated fans (e.g., 80mm or 120mm fans).
Select a filament that is strong and heat-resistant. PETG is recommended for its balance of printability and heat resistance. For higher heat, consider ABS or HTPLA, which can withstand temperatures up to 100u00b0C after treatment.
Download or create STL files for your cooler design. Print all necessary components using your chosen filament, ensuring structural stability to support your laptop's weight without flexing.
Secure fans using small screws (like M3x8) or double-sided tape. Connect fans to a power source, typically your laptop's USB port (5V), and manage cables neatly within designed channels or clips. Ensure all connections are secure.
After assembly, test your cooler under load using software to monitor CPU and GPU temperatures. Experiment with fan placement, fan speed, and laptop orientation on the cooler to achieve significant temperature drops and optimal performance.
This is a game-changer for anyone with a laptop that runs hot. I loved the detailed explanation of how a bespoke cooling solution can outperform off-the-shelf products. I designed one for my MacBook Pro, focusing on its unique airflow patterns, and the difference in CPU temperatures is significant. It’s awesome to finally have a cooler that’s perfectly tailored to my machine.
I’ve been struggling with my gaming laptop overheating for ages, especially during long sessions. This guide on 3D printing a custom cooler was a lifesaver! I followed the tips for designing around my specific vent locations, and the temperature drop is seriously impressive. No more throttling, and my games run so much smoother now. Highly recommend giving this a try if you’re a DIY enthusiast.
I tried to make a 3D print laptop cooler after seeing how it could prevent thermal throttling. While the concept is great for custom airflow, I found the actual printing and assembly a bit fiddly. My first attempt didn’t quite fit perfectly, and I had to reprint a section. It does work better than my old stand, but it wasn’t as straightforward as I hoped. Still, a good idea if you have the patience.
I always thought those generic laptop coolers were good enough, but after reading about how a custom 3D print can target specific hot spots, I was intrigued. The process was a bit more involved than I expected, especially getting the measurements just right for my Dell XPS, but the results speak for themselves. My laptop used to get uncomfortably warm, and now it stays much cooler even under heavy load. Worth the effort!