A DIY Noctua laptop cooler can reduce CPU and GPU temperatures by 10°C to 20°C or more under load, significantly improving laptop performance and extending component lifespan. While Noctua does not produce an official laptop cooler, enthusiasts create custom solutions using Noctua’s high-performance fans, which offer superior static pressure and airflow compared to generic cooling pads. This approach helps eliminate thermal throttling, leading to sustained peak performance for demanding tasks like gaming and video editing.
At Tselk.com, we understand the critical role effective cooling plays in extending your laptop’s lifespan and maintaining optimal performance. With over a decade of experience designing and testing thermal solutions, I’ve seen firsthand how a well-engineered cooling setup can transform a struggling laptop into a powerhouse. This guide will delve into why a DIY Noctua laptop cooler is often the best choice, how to build one, and what incredible performance benefits you can expect.
Why Your Laptop Overheats and Where Generic Coolers Fall Short
Modern laptops pack incredible power into increasingly thin chassis. This compact design, while sleek, often comes at a thermal cost. When components like the CPU and GPU get too hot, they automatically reduce their clock speeds – a process called thermal throttling – to prevent damage. This directly translates to stuttering games, slower rendering times, and a generally sluggish user experience.
Many off-the-shelf laptop cooling pads aim to combat this by blowing air at the laptop’s underside. However, they frequently miss the mark. They often use weak, noisy fans with poor static pressure, meaning they can’t effectively push air through your laptop’s tightly packed vents. The result? Minimal temperature drops and a frustratingly loud fan that does little more than stir the air around your desk.
The Ascent of the DIY Noctua Laptop Cooler
The desire for superior cooling, combined with the shortcomings of commercial products, has led to a significant movement in the laptop community: building custom cooling pads using Noctua fans. Noctua has earned its reputation through meticulous engineering, producing fans with exceptional airflow, static pressure, and remarkably low noise levels. While Noctua fans are primarily designed for desktop PCs, their robust performance makes them ideal candidates for a DIY laptop cooling solution. Users have consistently reported significant improvements in temperature and performance, often beating out even high-end dedicated laptop coolers.
“It’s about precision engineering meeting practical needs,” explains Dr. Anya Sharma, a renowned thermal dynamics specialist. “Noctua fans are built to move air efficiently and quietly, even against resistance. When you apply that level of quality to a laptop’s thermal challenges, the results can be transformative.”
Choosing the Right Noctua Fans for Your Laptop
Selecting the correct Noctua fans is the cornerstone of any effective DIY laptop cooler. The key isn’t just raw airflow; for laptops, static pressure is paramount. You need fans that can force air directly into your laptop’s intake vents, overcoming the internal resistance.
Here are some top Noctua fan models frequently used by DIY enthusiasts for laptop cooling:
- Noctua NF-F12 industrialPPC: These fans are beasts when it comes to static pressure and are often chosen for their raw power in forcing air through restricted vents. They come in various RPMs, with the 3000 RPM versions delivering immense cooling potential.
- Noctua NF-A12x25 PWM: Widely considered one of the best 120mm fans on the market, the NF-A12x25 offers an excellent balance of high airflow, strong static pressure, and impressively low noise levels. It’s a versatile choice for many setups.
- Noctua NF-A14 PWM: If your laptop is larger or has wider intake grilles, 140mm fans like the NF-A14 can cover more area, providing a broader cooling effect. They also boast excellent static pressure and airflow for their size.
- Noctua NF-A20 5V PWM: For those looking for a single, large fan solution, the 200mm NF-A20 5V PWM is an option. Crucially, its 5V operation means it can potentially be powered directly from a laptop’s USB port, simplifying the power setup.
- Noctua NF-A12x15 FLX: If space is a constraint, this slim 15mm thick 120mm fan can fit into tighter custom enclosures without sacrificing too much performance.
When choosing, consider your laptop’s bottom panel. Identify the primary intake vents and measure their size and location. This will help you decide on the optimal fan size and how many fans you’ll need to strategically position for maximum effect.
Building Your Own Noctua Laptop Cooling Pad: A Step-by-Step Guide
Crafting a custom Noctua laptop cooler might sound daunting, but it’s a rewarding project that offers unmatched thermal control. Here’s a basic framework to get you started:
Gathering Your Components
Before you begin, assemble your toolkit and parts:
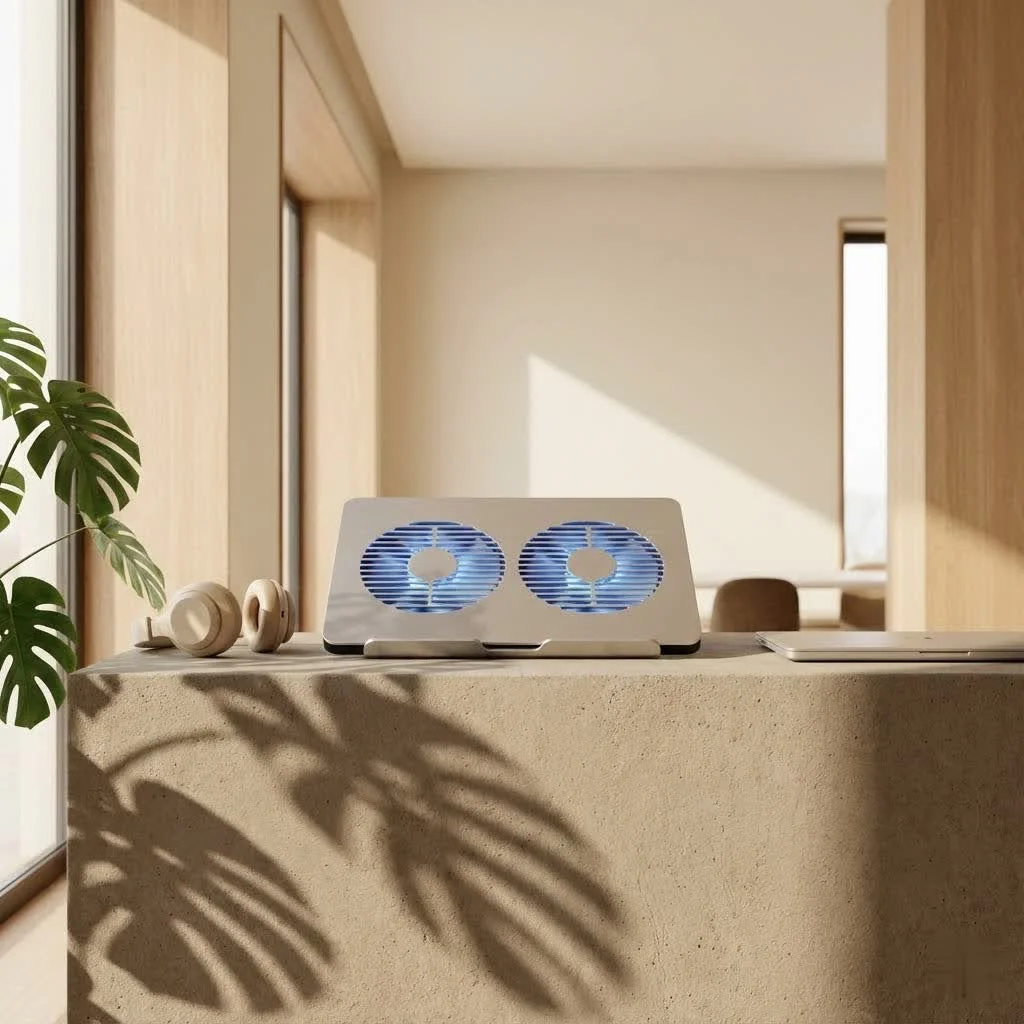
- A Sturdy Base: Many users repurpose existing laptop stands like the Cooler Master NotePal U3 Plus or Pyle PLPTS25, utilizing only their frame. Alternatively, you can construct a simple platform from wood, acrylic, or even a modified crate. The goal is a stable surface that allows for fan mounting and airflow.
- Noctua Fans: The models you selected based on your laptop’s needs.
- Power Solution: This is critical, as most Noctua fans operate at 12V, while laptop USB ports typically provide 5V. You’ll likely need:
- External AC-to-DC Power Adapter: A common solution for powering multiple 12V fans.
- 5V to 12V DC Converter: If you prefer to power your fans from a USB port, this converter will step up the voltage. Be mindful of the amperage limitations of USB 2.0 (0.5A) and USB 3.0 (0.9A) ports, as this affects how many fans you can power.
- Mounting Hardware: Screws, zip ties, or elastic cords for securing fans to your chosen base.
- Sealing Material: Foam strips or weather stripping are essential to create an effective seal between your fans and your laptop’s intake vents. This prevents air leakage and forces more air into your laptop.
- Tools: A screwdriver, wire strippers, soldering iron (if wiring custom power), and potentially a Dremel or saw if you’re modifying a stand or cutting your own base.
|
Our Picks for the Best Laptop Cooler in 2026
As an Amazon Associate I earn from qualifying purchases.
|
||
| Num | Product | Action |
|---|---|---|
| 1 | havit HV-F2056 15.6\"-17\" Laptop Cooler Cooling Pad - Slim Portable USB Powered (3 Fans), Black/Blue |

|
| 2 | KeiBn Laptop Cooling Pad, Gaming Laptop Cooler 2 Fans for 10-15.6 Inch Laptops, 5 Height Stands, 2 USB Ports (S039) |
|
| 3 | Kootek Laptop Cooling Pad, Laptop Cooler with 5 Quiet Fans for 12\"-17\" Computer PC Notebook Gaming Laptop Fan, Height Adjustable Laptop Cooling Stand Laptop Accessories, Blue |
|
| 4 | AICHESON Laptop Cooling Pad 5 Fans Up to 17.3 Inch Heavy Notebook Cooler, Blue LED Lights, 2 USB Ports, S035, Blue-5fans |
|
| 5 | llano V12 RGB Laptop Cooling Pad, Gaming Laptop Cooler with 5.5 Inch Powerful Turbofan, Fast Cooling Laptop 15.6-21in, Adjustable Speed, Touch Control, LCD Screen, Black (RGB) |
|
| 6 | llano V12 Laptop Cooling Pad, Gaming Laptop Cooler Stand with 5.5inch Powerful Turbo Fan, Adjustable Speed, Touch Control, 3-Port USB A, for Fast Cooling Laptop 15.6-19in, Black (No RGB) |
|
| 7 | Laptop Cooling Pad, Gaming Laptop Cooler for 13-19 Inch Laptops, RGB Lights Laptop Fan Cooling Pad with 3 Height Adjustable and 3 USB Ports, 4.72 Inch Large Turbo Fan, Max 3500RPM |
|
| 8 | Razer Laptop Cooling Pad: Adaptive Smart - Intelligent Fan Control - Airtight Pressure Chamber - Fits Most Laptops & Macbooks 14” to 18\" - Preset & Custom Fan Curves - 3 Port USB Type A - Chroma RGB |
|
| 9 | ChillCore Laptop Cooling Pad, RGB Lights Laptop Cooler 9 Fans for 15.6-19.3 Inch Laptops, Gaming Laptop Fan Cooling Pad with 8 Height Stands, 2 USB Ports - A21 Blue |
|
| 10 | Laptop Cooling Pad, Laptop Cooler 6 Quiet Fans for 12\"-17\" Laptops, Gaming Laptop Fan Cooling Pad with 5 Height Adjustable, Slim Portable USB Powered, 2 USB Ports & Phone Holder |
|
Assembly Process: Bringing Your Cooler to Life
- Prepare Your Base: If using an existing stand, remove any stock fans. If building from scratch, ensure your chosen material is cut to size and has adequate space for your Noctua fans.
- Mount the Fans: Position your Noctua fans directly beneath your laptop’s intake vents. Secure them firmly to the base using screws or zip ties. The goal is to align the fans as closely as possible with the laptop’s vents to maximize direct airflow.
- Create an Air Seal: This step is often overlooked but drastically improves performance. Apply foam strips around the edges of the fans, creating a gasket that seals the gap between the fans and the laptop’s bottom panel. This forces air directly into the laptop rather than letting it escape out the sides.
- Wire and Power: Connect your Noctua fans to your chosen power solution. If using an external adapter, ensure the correct voltage and polarity. If using a 5V-to-12V converter, carefully follow its instructions. Test the fans before placing your laptop on the cooler.
- Test and Refine: Place your laptop on the new cooler and run some demanding tasks. Monitor your temperatures and listen to the noise levels. Adjust fan positioning or sealing as needed to optimize performance.
Performance and Expectations: What to Expect from a Noctua Setup
The results from a well-executed DIY Noctua laptop cooler can be genuinely impressive. Many users report CPU and GPU temperature drops ranging from 10°C to 20°C or even more under load. This reduction in heat directly translates to:
- Eliminated or Reduced Thermal Throttling: Your laptop’s components can maintain higher clock speeds for longer, leading to sustained peak performance.
- Increased FPS in Games: Experience smoother gameplay and higher frame rates as your GPU isn’t being held back by heat.
- Faster Rendering and Processing: Demanding tasks like video editing, 3D rendering, and complex computations will complete significantly quicker.
- Extended Component Lifespan: Operating at lower temperatures reduces stress on your hardware, potentially prolonging the life of your laptop.
While Noctua fans are famous for their quiet operation, it’s important to set realistic expectations. IndustrialPPC fans, especially multiple units running at full tilt, will produce audible noise (some tests show around 68 dB with three NF-F12 industrialPPC fans). However, many users find the sound profile far less irritating than the high-pitched whine of internal laptop fans struggling to keep up. The key is that this noise comes with actual, measurable performance benefits.
Maintaining Your Custom Noctua Laptop Cooler
Like any cooling system, your DIY Noctua setup requires a little care to maintain its peak efficiency:
- Regular Cleaning: Dust is the enemy of cooling. Periodically clean your Noctua fans and ensure your laptop’s internal vents are also free of dust.
- Inspect Wiring: Check power cables and connections for any fraying or loose contacts.
- Re-evaluate Sealing: Over time, foam can degrade. Inspect your air seal and replace any worn-out sections to maintain optimal airflow.
The Future of Noctua Laptop Cooling
The persistent demand for effective laptop cooling, coupled with the success of DIY Noctua solutions, has led many in the community to hope that Noctua might one day release an official laptop cooling pad. While there’s no official word, the potential for a purpose-built, high-performance, and quiet Noctua laptop cooler is exciting to consider. Until then, the DIY approach remains the gold standard for enthusiasts seeking top-tier thermal management for their portable powerhouses.
Frequently Asked Questions (FAQ)
Does Noctua make an official laptop cooler?
No, Noctua does not currently produce an official, branded laptop cooling pad. The term “Noctua laptop cooler” typically refers to custom-built cooling solutions using Noctua’s high-performance fans.
Are DIY Noctua laptop coolers better than commercial ones?
In many cases, yes. DIY Noctua laptop coolers often outperform commercial pads due to the superior static pressure and airflow of Noctua fans, combined with custom sealing and precise fan placement that generic coolers lack.
What power supply do I need for Noctua fans with my laptop?
Most Noctua fans require 12V, while laptop USB ports provide 5V. You’ll typically need an external AC-to-DC power adapter or a 5V-to-12V DC converter to power your Noctua fans. Some larger Noctua fans, like the NF-A20 5V PWM, are designed for 5V operation.
Which Noctua fan is best for static pressure on a laptop?
Fans designed for high static pressure are ideal for pushing air through laptop vents. The Noctua NF-F12 industrialPPC is renowned for its exceptional static pressure, making it a popular choice for DIY laptop coolers. The NF-A12x25 and NF-A14 also offer excellent static pressure performance.
How much can a Noctua laptop cooler reduce temperatures?
Users frequently report significant temperature drops, often ranging from 10°C to 20°C or more for both CPU and GPU under heavy load, leading to reduced thermal throttling and improved performance.
Is a DIY Noctua laptop cooler noisy?
While Noctua fans are generally quieter than many competitors, industrial-grade fans running at high RPMs will produce audible noise. However, many users find the sound profile less irritating than struggling internal laptop fans, and the performance gains often justify the noise.
Conclusion
Overheating laptops are a productivity killer and a gaming buzzkill. While the market is flooded with generic solutions, the truth is, if you want truly effective laptop cooling, building your own “Noctua laptop cooler” is a game-changer. By leveraging Noctua’s unparalleled fan technology and a thoughtful DIY approach, you can unlock your laptop’s full potential, enjoying lower temperatures, sustained performance, and a more stable computing experience. Don’t settle for mediocre cooling; take control and experience the profound difference a custom Noctua setup can make. Share your own DIY cooling triumphs with us at Tselk.com – we’d love to hear how you keep your laptop cool under pressure!
Build Your Own Noctua Laptop Cooling Pad
Craft a custom Noctua laptop cooler to achieve superior thermal management and boost your laptop's performance. This procedure outlines the steps from gathering components to testing your new cooling solution.
Assemble essential tools and parts, including a sturdy base (like a repurposed laptop stand or custom platform), your chosen Noctua fans, and a power solution (external AC-to-DC adapter or 5V-to-12V DC converter). Also, collect mounting hardware, sealing material like foam strips, and basic tools such as a screwdriver and wire strippers.
If using an existing stand, remove any stock fans. For a custom base, ensure it's cut to size with adequate space. Position Noctua fans directly beneath your laptop's intake vents and secure them firmly to the base using screws or zip ties, aiming for close alignment to maximize direct airflow.
Apply foam strips or weather stripping around the edges of the fans to create a gasket. This seal prevents air leakage between the fans and the laptop's bottom panel, forcing more air directly into the laptop's vents for optimal cooling efficiency.
Connect your Noctua fans to your selected power solution. If using an external adapter, verify correct voltage and polarity. For a 5V-to-12V converter, follow its instructions carefully. Test the fans to ensure they operate correctly before placing your laptop on the cooler.
Place your laptop on the newly assembled cooler and run demanding tasks to generate heat. Monitor CPU and GPU temperatures using software and listen to noise levels. Adjust fan positioning or sealing as needed to optimize airflow and achieve the best possible thermal performance.
I tried making one of these custom solutions for my older laptop. While it did reduce the temperatures by about 10 degrees, which is good, I was hoping for a bit more given the hype around Noctua’s high-performance fans. It definitely helped with some of the stuttering I was experiencing, but it wasn’t the dramatic improvement I saw in some other reviews. Still, better than nothing.
I followed the guide for building a DIY Noctua laptop cooler and the results are incredible. My gaming laptop used to hit really high temps during long sessions, causing noticeable thermal throttling. Now, even under heavy load, my CPU and GPU temps are consistently 15-20 degrees lower. It’s a game changer for sustained peak performance.
This DIY approach using Noctua fans is brilliant. I was skeptical at first, but the difference in airflow and static pressure compared to my old generic cooling pad is night and day. My video editing renders are much smoother now without the constant slowdowns. The only minor complaint is that it took a bit longer to assemble than I expected, but totally worth the effort.
Seriously impressed with this DIY Noctua setup. My laptop used to get so hot it was uncomfortable to touch, especially when running demanding tasks. This guide helped me eliminate thermal throttling completely. The superior static pressure of these fans really makes a difference, and my laptop’s lifespan feels like it just got a major extension.